3- Request details
This is the final step to open a request. Here, you’ll need to fill in the required information. Depending on the Problem Type you selected, the fields displayed in this section will vary.
Please note that some fields are mandatory (marked by *) to submit the request, while others are optional.
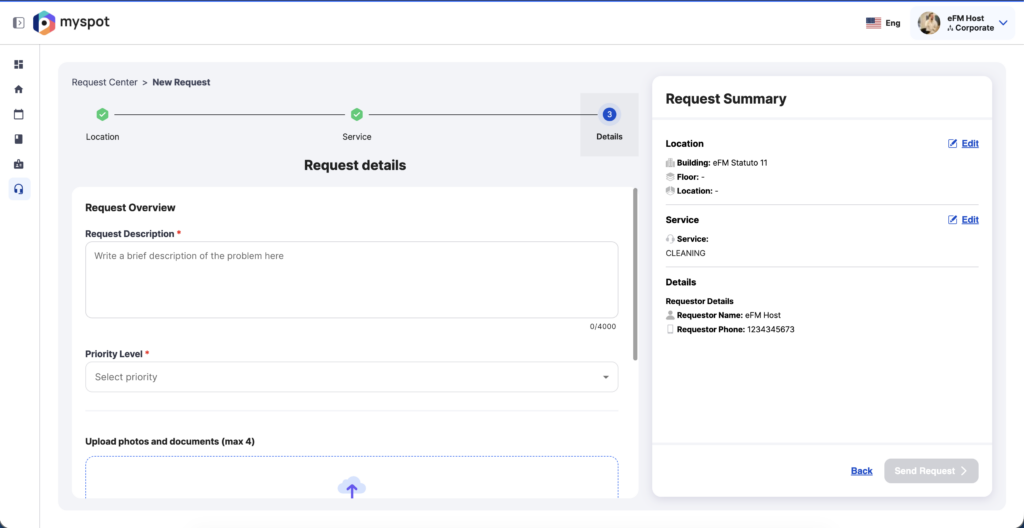
Request Description
In the Request Description field, clearly describe your request or issue. Specify what needs to be done and include any relevant details, such as when the issue started, how often it occurs, and its impact on your work.
Select the Priority
Use the dropdown to select the appropriate priority for you request.
Request priority level options are related both to building and problem type.
Additional Information
Based on your company specific need you will be able to fill one, or more of this additional fields:
Cost center and preferred date and time of execution
Only for “service type” request you can specify the WBS Element (Cost center) and a desired date and time for the service to be executed. Select your preferred date and time, and this information will be communicated to the contractor through myspot.
Upload photos and documents
Click Upload to attach any files related to your request. You can upload up to 4 files, with a maximum size of 10 MB each.
Supported formats: doc, docx, dwg, jpeg, jpg, pdf, png, xlsx, mpp, csv
Requestor Details
Enter the Requestor Name and Requestor Phone.
Send Request
Before submitting, review the request summary on the right. If you need to make any changes, click Edit or the Back button next to Send Request.
Once you click Send Request, the system will verify whether a similar request has already been submitted.
If a duplicate request is detected, clicking Send Request will display the corresponding feedback.
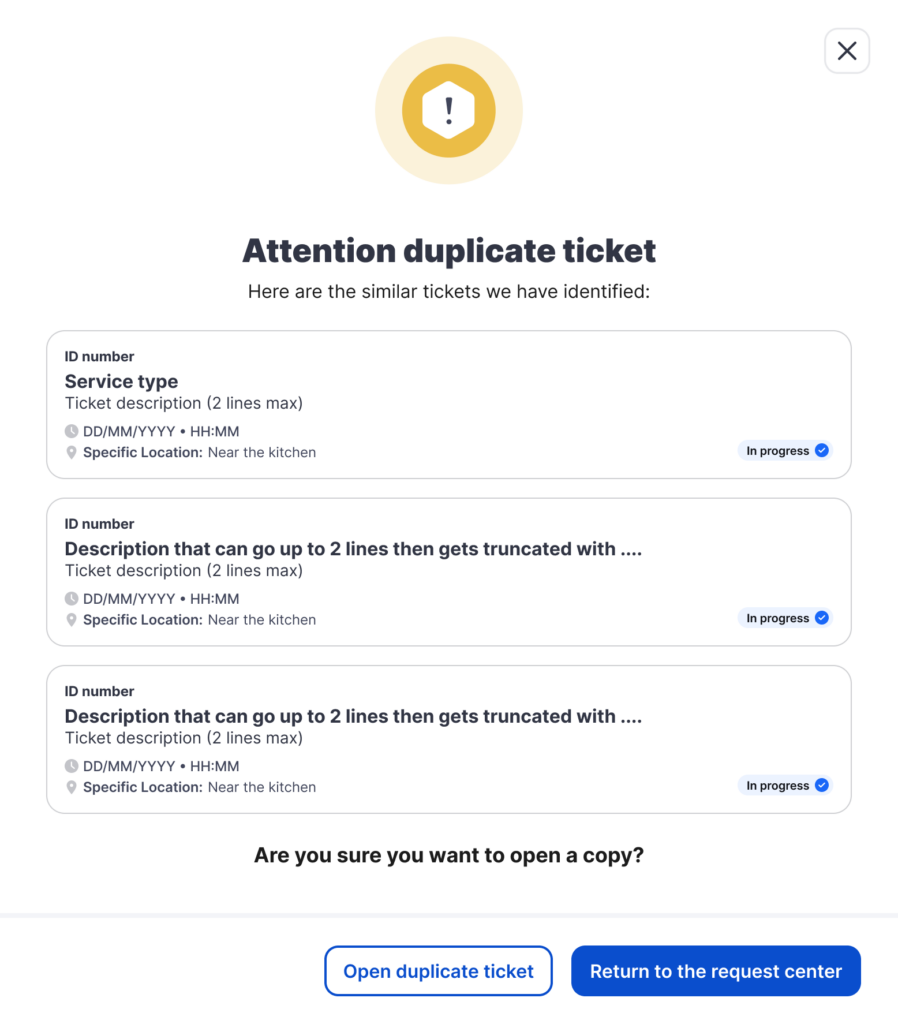
If no duplicate are detected or you confirm to open a duplicate, you will receive a success feedback and can proceed to review your ticket details inside the request table.
This is the final step to open a request. Here, you’ll need to fill in the required information. Depending on the Problem Type you selected, the fields displayed in this section will vary.
Please note that some fields are mandatory (marked by *) to submit the request, while others are optional.
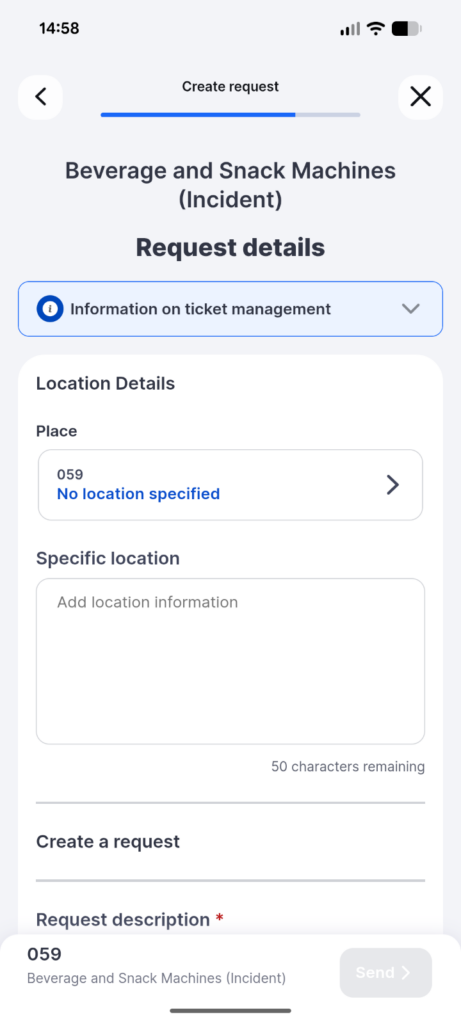
Select location
Select floor
Click Select floor to open the list, then choose the floor where you want to create the request.
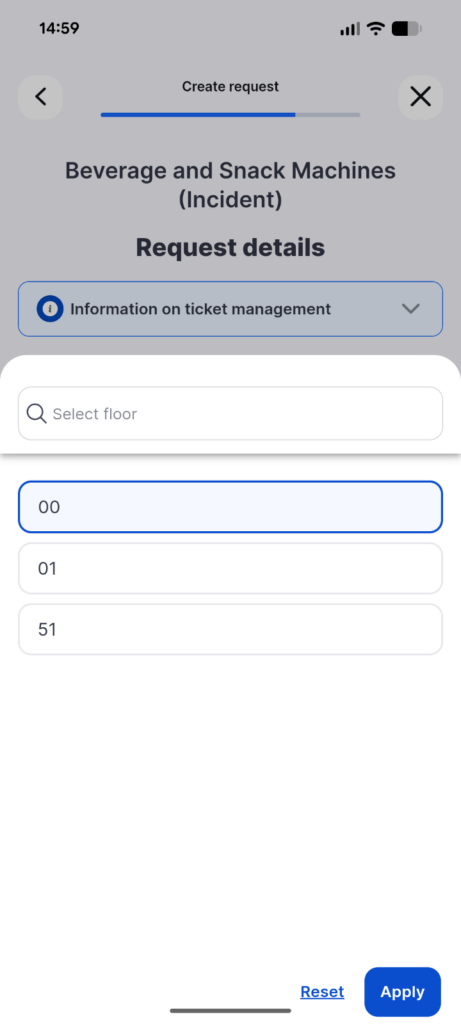
Select location
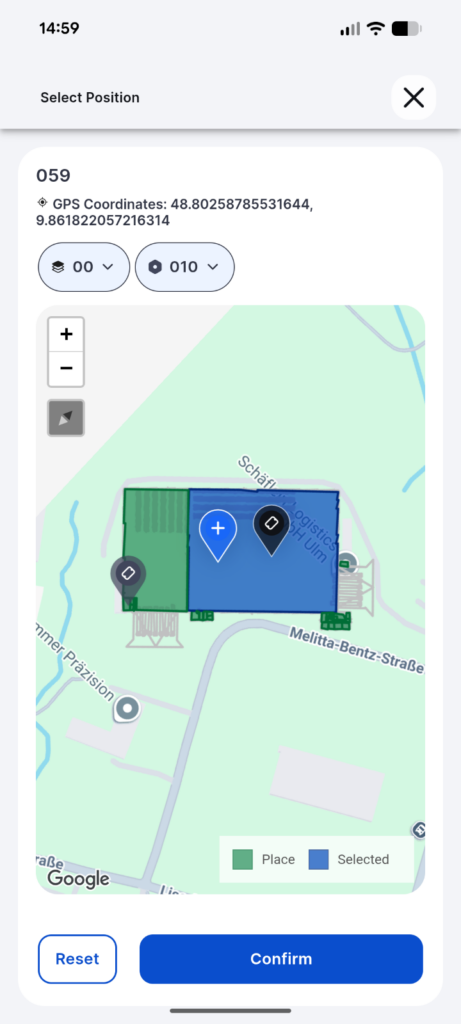
Depending on how your system is configured, you may select the location or area from a list or a georeferenced floor plan, we will go over how both system works.
Dropdown: Select the Area from the a text list, very similar to selecting the floor
Click Select area to open the list, then choose the room or zone where you want to create the request. The list may include room names.
Map: Select the Area from a georeferenced floor plan
Click Select Area to open the floor plan. From here, you can pan, zoom, and click on the room or zone you need.
You’ll also find two filters :
-One to change the floor, in case you accidentally chose the wrong one.
-Another with the names of the building’s Area, allowing you to select directly from the list instead of using the floor plan.
Existing tickets are displayed on the plan. By clicking an existing request pin, you can view the details of open tickets and avoid creating duplicates.

When you select the desired area inside the building, the zone will be highlighted in blue. (If you select an area outside the building, the zone will not be highlighted, and only the blue pin will appear.)
The New Request blue pin will then appear along with the GPS coordinates , and the Confirm button will be activated.

When you’ve chosen the area, click Confirm to proceed.
Specific location description
Use the Specific location field to manually add precise details about the exact spot.
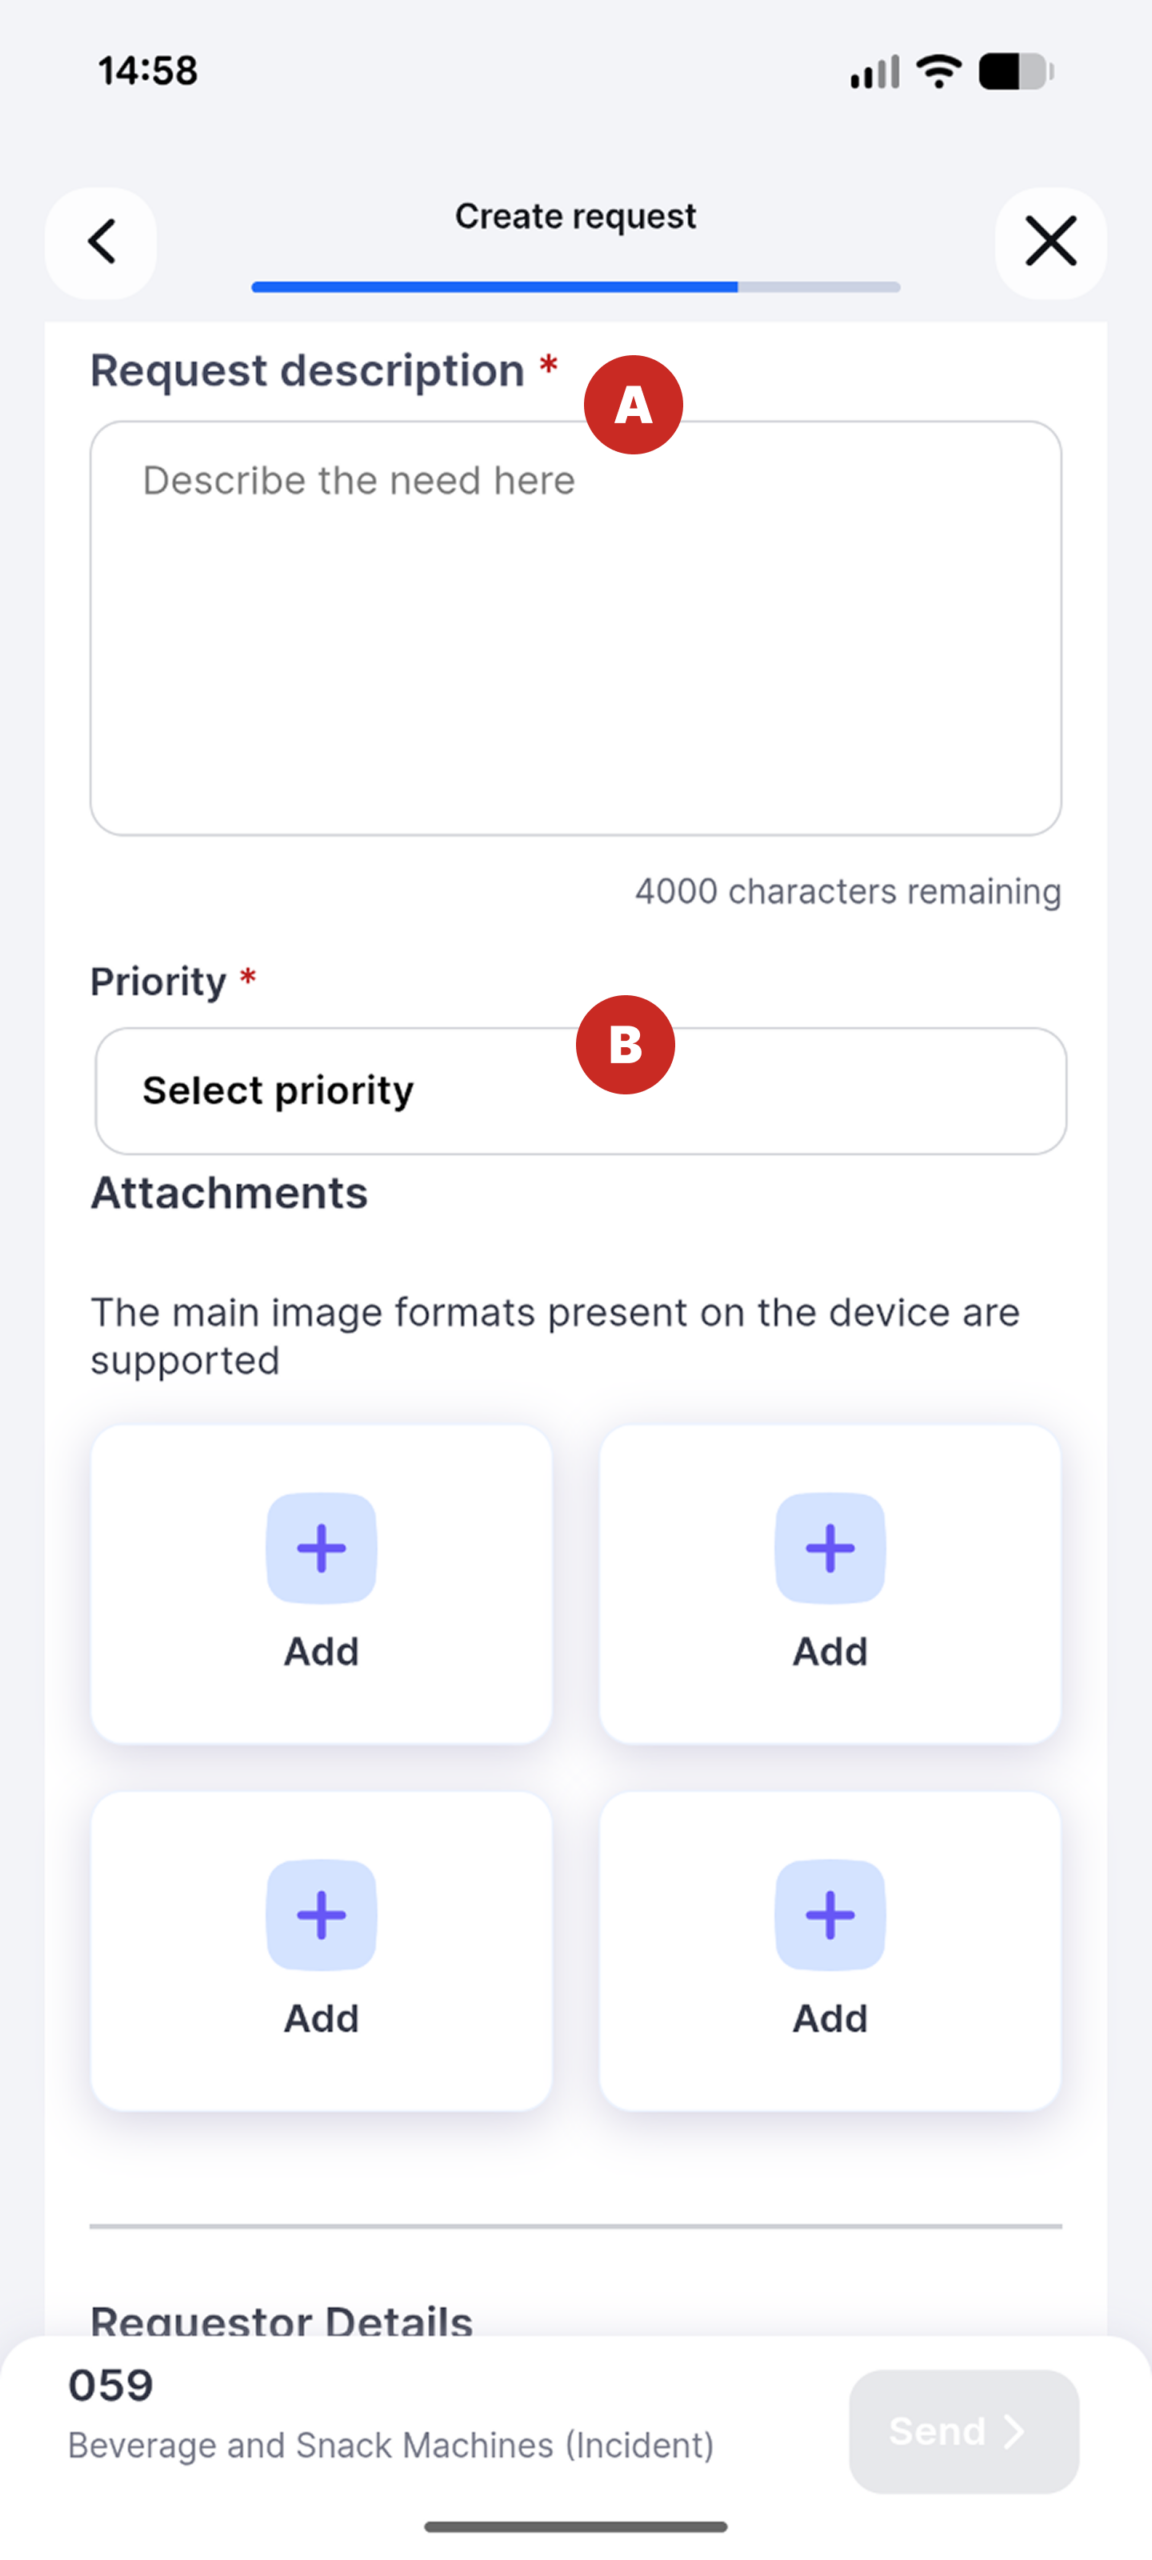
Request Description
In the Request Description field (A), clearly describe your request or issue. Specify what needs to be done and include any relevant details, such as when the issue started, how often it occurs, and its impact on your work.
Select the Priority
Use the dropdown (B) to select the appropriate priority for you request.
Request priority level options are related both to building and problem type.
Additional Information
Based on your company specific need you will be able to fill one, or more of this additional fields:
Cost center and preferred date and time of execution
Only for “service type” request you can specify the WBS Element (Cost center) and a desired date and time for the service to be executed. Select your preferred date and time, and this information will be communicated to the contractor through myspot.
Upload photos and documents
Click Upload to attach any files related to your request. You can upload up to 4 files, with a maximum size of 10 MB each.
Supported formats: doc, docx, dwg, jpeg, jpg, pdf, png, xlsx, mpp, csv
Requestor Details
Enter the Requestor Name and Requestor Phone.
Send Request
Before submitting, review the request summary on the right. If you need to make any changes, click Edit or the Back button next to Send Request.
Once you click Send Request, the system will verify whether a similar request has already been submitted.
If a duplicate request is detected, clicking Send Request will display the corresponding feedback.
If no duplicate are detected or you confirm to open a duplicate, you will receive a success feedback and can proceed to review your ticket details inside the request table.