2- Details & Guest
This is the final step to create an invite. Here, you’ll need to fill in the required information.
Depending on the building you selected, the fields displayed in this section may vary.
Please note that mandatory fields are marked by *
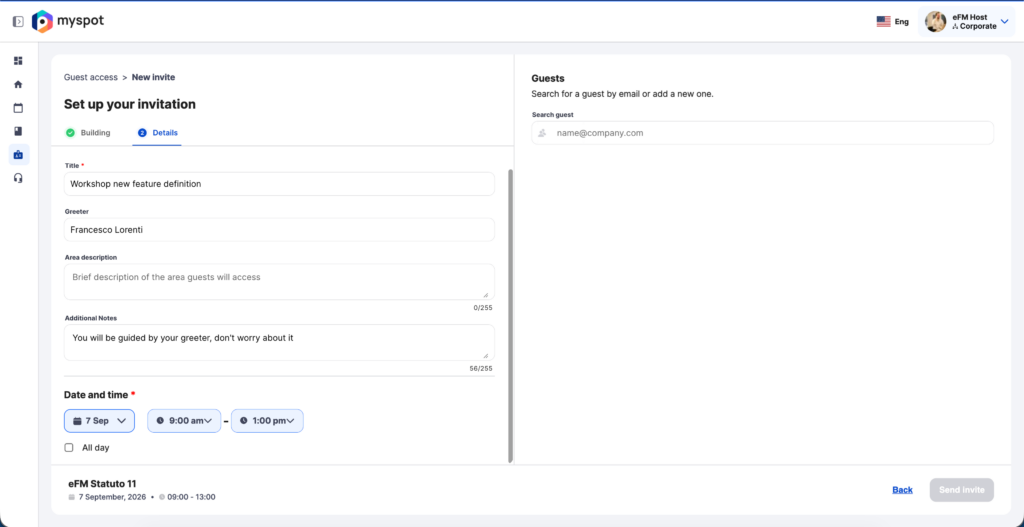
Invite Description
You will need to fill in all the information to describe your invite.
Here is a description of every field:
-Title: Name of the meeting, make it as clear as possibile for your invitee
-Greeter: Text field useful to enter the name of the greeter if its different from the host
-Area description: Information on the are area the guest will have access to
-Additional notes: All other information you want to send to the invitee
-Date and time: The validity of the QR code generated for access will be related to this info
Guest informations
Use the search bar to find the guest you want to invite by entering their full email address.
If the email address is found in our system and the user is already registered, follow Flow A. Otherwise, you’ll need to register the guest as a new user by following Flow B.
There are no limit to the number of guest you can add to a single invite.
A-Existing guest
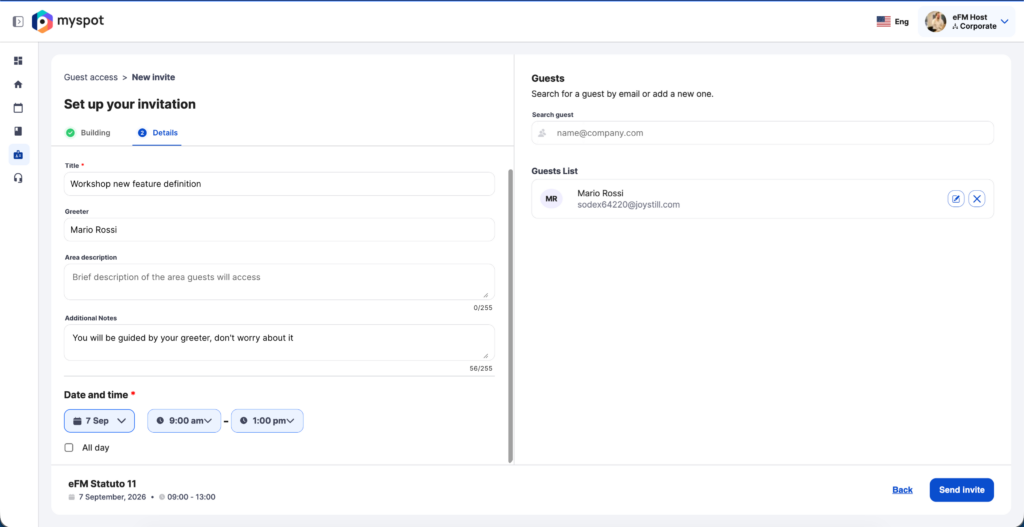
The existing guest will be added to your invite. You can still edit or remove them using the buttons on the right side of the invitee card.
For registered guests, you can only edit their Name, Surname, and Company.
B-New guest
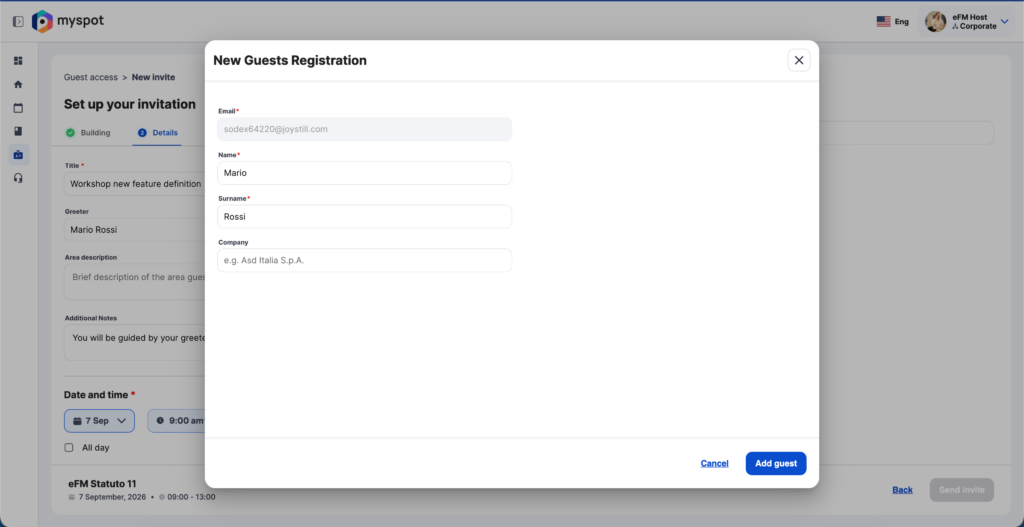
You’ll need to fill in all the required guest information (Name, Surname, and Email) in order to add them to the platform.
Send Invite
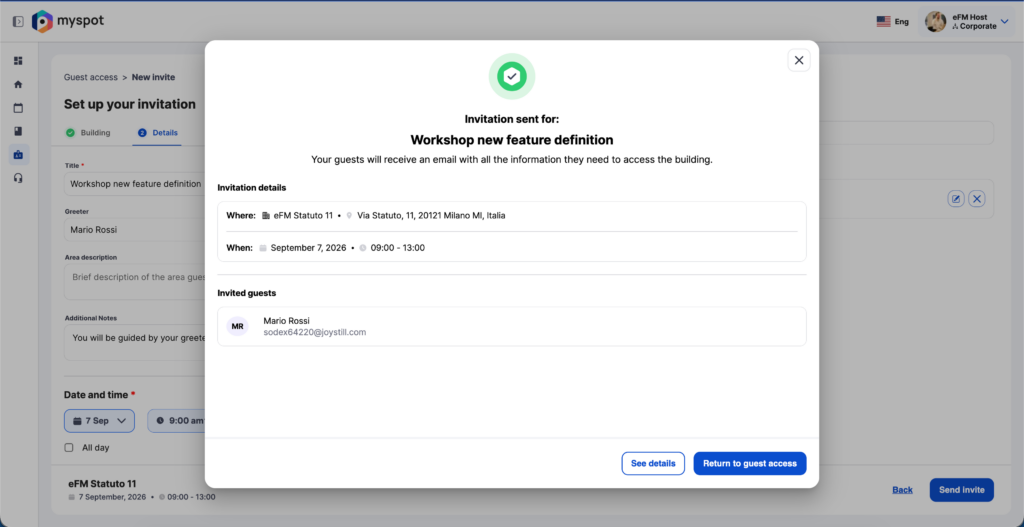
Once you click Send Invite, the system will create the invite and send all required emails to your guests’ email addresses.
You will then see the following confirmation message:
This feature is currently available only via webapp